Beauty, Life & Style

Sunday 19 November 2017

Gifting The Perfect Fragrance


When it comes to Christmas gifting, I always find that fragrances are my go-to product as they just make such amazing, classy presents. I think some people find scents a little bit challenging to buy but these two are fail safe. My favourite website for picking up fragrances is Fragrance Direct where they have an amazing selection of luxe perfumes and incredible discounts so you can pick them up cheaper. For people like me, who are poor students, we need all the discounts we can get. Also it's nice to save a little bit of money over Christmas because it means you're not scraping through till the January payday. So here are my two top picks. 


So let's start with this gorgeous perfume which is the Chloe Signature EDP which comes incased in the most beautiful elegant looking packaging complete with a cute little bow. It smells so sophisticated and feminine and I'm so happy to now have it in my collection. I mean, it also makes for a good blogging prop and looks so pretty on my dressing table. It makes me feel very sophisticated even though I'm clumsy as anything so yes, what a winner. 


Next up is one of my all time favourite perfumes by Marc Jacobs, Daisy. I've already been through a bottle of this and it just smells so beautiful. The packaging is stunning, just look at that bottle top, and it's just such a fail safe fragrance that I think that any girl would be happy with. I always spray a little bit of this in my hair and it just seems to linger all day. However, if you don't like this one you may find that the Daisy Eau so Fresh is for you because it smells absolutely gorgeous as well (there's a really good deal on a gift set for this at the moment by the way). 

If you don't think these are for you, my other favourites include Yves Saint Laurent Black Opium, a beautiful vanilla scented scent, and Paco Rabanne Olympea, which is literally a dupe for Coco Mademoiselle and smells incredible. There's such a great range on the Fragrance Direct website at the moment so it's perfect for getting those Christmas presents for any guy or gal! I hope you've enjoyed reading this post and you don't leave buying presents til the last min like I do - I start off with good intentions but then I get distracted by buying myself presents oops. 

Til next time xxx


*This post is in collaboration with Fragrance Direct but all opinions are 100% my own*
Share:

Tuesday 7 November 2017

Keeping The Glow This A/W: Cream & Liquid Highlighters For A Dewy Base


I always feel that as the seasons grow colder, my skin gets drier so my favourite thing right now is applying a cream or liquid highlighter just on it's own or under a power based highlighter to really give a dewy, healthy, 'lit from within' base. 

Cream Highlighters 


I think that cream highlighters are really lovely but can look a little bit cakey if you go over board with product or aren't blended out properly. But isn't that the same for everything if you don't blend out properly? 


The NARS multiple stick in Copacabana is one of my favs for applying straight onto the skin, sometimes I apply this to my fingers first and then blend onto the skin or apply directly onto the high points of my face and blend using a kabuki brush for a seamless finish. The same goes for this highlighter by Milk Makeup in the shade Lit (which it is by the way, it's LIT). 

Copacabana is a beautiful light pink champagne shade which is actually quite thin whereas Lit is a thicker formula and really gives a golden glow cause the shade is gold - duh. This one requires a little bit more blending and I usually spray a little bit of my Pixi Milky Hydrating Mist over my face and then blend everything in with one of my Sigma Kabuki brushes for a really beautiful natural finish. Once applied you can either just leave it, which looks utterly stunning and natural, or you can add a little bit of power highlighter over the top which will really pop


Liquid Highlighters 


If you want ultimate dewy skin goals, liquid highlighters will be your new best friend. As well as applying these over the top of your foundation, you can apply these before application for a really illuminated base. 


Starting with something I only have a sample of is the Mac Strobe Cream. I have a few of these which came with some Mac deliveries and they have lasted me a very long time (I'm still using up the first one!). I know this is called a cream but to me it's very liquidy, hence, including it in the liquid highlighters section. This actually comes out as pure white with gorgeous pearly iridescent reflects, but don't be worried about blending it out as it's very thin. I believe this is actually a moisturiser but I like to use it over the top of my base makeup patted into the high points of my face with a little bit of powder highlight over the top. I think any moisturiser placed over the top of your makeup gives a really dewy radiant glow but this is just on another level. 

Finally, we have the most majestic liquid highlighter. This is the Cover Fx Custom Enhancer Drops in the shade Moonlight. This comes out as molten champagne goodness and when blended into the skin is just so majestic but still quite natural looking and not at all cakey. Because these come out as drops with a little pipet, t's really easy to add a little bit into your foundation for a really radiant finish. The only downfall with this product is the price but having said that it's a beautiful high quality product and you really pay for what you get. 

(From top to bottom: Milk Makeup: Lit, NARS: Copacabana, Mac: Strobe Cream, CustomFx: Moonlight)


I hope you've enjoyed reading this post about my dewy highlighter favs and that your skin makes it through this winter without drying out, may the skin gods be with you. 

Til next time xxx 


Share:

Thursday 26 October 2017

Lush Halloween Picks


One of my favourite things throughout the year are all the Lush seasonal releases, they contain some of my products to date and the Halloween range contains one of my favourite scents ever - I will use it year round cause it's so beautiful. So anyway, lets get on with my halloween lush picks. 

Oh bless, my lil one is suffering from a lil bit of conjunctivitis (I mean let's be honest.. He's completely dead). I cannot get over how beautiful this smells, I'm so bad at describing scents but this is divine and contains a combo of lime and neroli oils. I'm not sure whether it was because I was keeping mine in the bathroom, relatively near to the ceiling (so my brothers couldn't pinch them) but mine went a little bit gooey, melty and crumbly.. You can probably tell from the photos, but still, can't wait to use this on Halloween! I'll definitely be purchasing another one of these before they go out of season as they smell, so, good. Big fan.


Sparkly Pumpkin Bubble Bar

So this is the original pumpkin bubble bar and it just smells like everything good and right with the world, a.k.a. Autumn. It is very glittery, fruity and an essential bath product when it comes to setting magical halloween vibes. I mean, need I go on with this one? It speaks for itself really.

Pink Pumpkin Bubble Bar 

Unlike the original pumpkin bubble bar, this one smells more floral and is covered in pink glittery goodness. Even though I adore the original, this one also smells so amazing. I would actually go as far to say that I prefer this to the original one?! Maybe it's because the scent is quite fresh which I love and you can definitely pick out the jasmine. Love love love.


Oh my lord, this shower cream smells amazing. It contains a mix of 'spicy patchouli, stimulating black peppercorn and fragrant vanilla'. This scent to me is so earthy and musky but reminds me of hot spices too - oh honestly it's just so nice. When you use it in the shower it is a little alarming to be applying a bright green shower gel (it washes off though obviously) but it just smells incredible and that scent stays on the skin which I love. This is to date one of my favourite scents and it's probably one of their best scents (in my opinion). I would also say that I probably prefer this scent to Snow Fairy..  I know I know, I still love the Snow Fairy shower cream but Lord of Misrule, you are just on another level.


So those were my Lush Halloween picks from this year. I am so excited to do a massive festive/Christmas Lush haul (which I feel like is acceptable as soon as we hit Nov 1st), can't wait for all the Snow Fairy products (even though Lord of Misrule is where the party is at). Hope you've enjoyed reading!

Til next time xxx
Share:

Wednesday 18 October 2017

New High-End Additions To My Beauty Stash


Today I thought I would share some of the newbies to my makeup stash as I appear to have gone off the wagon and splurged on some high end products which I'm so excited to try out. It may have started with the justification that it would be wise to invest in them as Space NK were doing £15 off a £60 spend and that was all the justifying I needed - oh I am so weak.

So I thought I'd start off with this beautiful bronzer: the Hourglass Ambient Lighting Bronzer in the shade Luminous Bronze. I have actually already been through one of these and needed to repurchase it again. Now this bronzer is near the top of the bronzer food chain coming in at £45 per compact. Yes, it's eye wateringly expensive, and unlike the Hourglass blushers which seem to last forever, I used up my last one seemingly quite quickly. Honestly it's 100% worth it as this bronzer is utterly stunning and I swear by it. If you have the cash huns, don't be afraid, this bronzer will be your new BFF giving you sun kissed bronze realness.


Next up is an eyeshadow I have been wanted to try for years but never got round to it because my eyeshadow addiction is out of hand. However, these colours are the most beautiful shades for Autumn so obviously now is the perfect time to purchase this. Yes you named it, it's the NARS Eyeshadow Duo in shade Isolde, featuring gold copper goodness. I've never tried any NARS eyeshadows before but I love the blushers so I have high hopes for this.


Finally, we have a product from Sunday Riley. I finally made the decision to take the splurge - I mean £68 for one product just makes me want to cry - and pick up one of these oils, specifically the U.F.O. Ultra-Clarifying Face Oil which is designed to treat and prevent acne. Honestly, the stress of going back to uni for my final year has given me major congestion and from watching Samantha Ravndahl's videos (especially this video linked here) and reading a tonne of reviews, this oil has been highly commended for it's skin clearing benefits and that's what I need right now. I think that seeing as this was so pricey, there will definitely be a post coming up in the near future to say if it's actually worth the splurge - cause lets be honest, there are a lot of cheaper alternatives on the market. But please can we take a moment to appreciate the beautiful packaging, its so luxurious, I love it.


There you have it, the new high-end additions to my beauty stash (writing a blog post about them makes me feel like I can justify the spend even more) and I hope you've enjoyed reading this post. Also, I'm so impressed with the photography I took for these considering it's been raining all day today so the natural lighting has been tragic - so not cool. 

Til next time xxx

Share:

Sunday 15 October 2017

New in: Charlotte Tilbury Liquid Lipstick in Rising Star | Buy or Bye


So it should be known that I'm a massive Charlotte Tilbury lipstick fan. I love and have some (I mean quite a lot) of her other products but in particular I adore her lipsticks and they seem to be the only lip products I wear these days. Obviously, when she came out with these liquid lipsticks I'm like hellO new lip products, and goodbye money.


Like with all Charlotte Tilbury products, the packaging is to die for. These little liquid lipsticks still harbour the iconic rose gold encasing like the original lipsticks but they have red detailing on the front and the back. The wand as well is also different from normal liquid lipstick applicators. It's curved so that it fits the contours of your lips and has a little flat point at the top for application ease. Overall, the packaging gets a 10/10 from me because once again, Charlotte has completely nailed it with her beautiful packaging.

So after debating which shade I should go for I decided to take the plunge and order Rising Star as it promised to be a warm pink matte and as I love Liv It Up so much and didn't think they'd be dissimilar.. they couldn't be more further apart. This shade is a lot rosier/muted than I had hoped for. But anyway, the shade aside, let's talk about the formula. 


The formula is very similar to the NYX Soft Matte Lip Creams - it's not drying at all and very comfortable on the lips, honestly doesn't feel like you're wearing anything at all! Because it's not very drying, it does come off in the middle of your lips but I will say that it comes off really nicely. You're probably thinking what?! It comes off nicely? Well you heard right sista. You know those liquid lipsticks which, when they wear off are really noticeable and leave basically a solid line across your lips? Well this doesn't do that. I don't know if it's the shade, because it's quite similar to my natural lip colour, but it fades off quite nicely which I do really like.

So speaking of the shade, it's very similar to Dolce by Anastasia Beverly Hills, I'd say a little bit lighter than that actually but, still quite similar. I think that's the thing with matte liquid lipsticks, you just don't get that juiciness that lipsticks can give you as the colour is slightly dulled down. For me this shade was quite a muted rosey pink/coral... It does not suit me at all.


I prefer this shade - Rising Star - patted into the lips rather than a full layer applied to the entirety - just because I think it looks nicer and isn't as drying. I do love putting a lipstick over the top of liquid lipsticks anyway - to prolong the wear time - and Rising Star mixed with the CT Kim KW Lipstick creates a beautiful shade of pink which I'm loving at the moment.

The only negative I have with this shade in particular is that it's not the same shade as advertised on the website so I'm a little bit disappointed on that front. It's still a nice colour and would suit other people I just wish I had a chance to swatch them before buying - oops. So if any of you try any of the other shades please let me know but I'm thinking that I probably should have gone for Dolly Bird which looks like a gorgeous ballet pink shade. To me, this product is a bye because the shade does not suit me and I spent £24 on it, but the formula is a buy. If only I had found a shade that I liked/suited me! 

Til next time xxx 

Share:

Thursday 12 October 2017

The Instagram Guide To Disneyland Resort California & 10 Tips For Making The Most Of Your Day


Okay, it's no secret that I'm a massive Disney fangirl but this place, while it is magical, is an instagrammers dream. I mean cmon, everything is so so beautiful. So here are my top places to take photos in Disneyland California main park (we didn't make it to the other one, maybe one day). So here are my top places to take pictures for those dreamy instagram pictures and tips for making the most of your day there. Be warned, this is such a long post but I lavvvv it! (Also how cute is the flatlay I took for this post - it's literally made of dreams). 

The Entrance


Yup that's right, as soon as you get into the park there's a great photo opportunity - but try and get one without people in the way because let me tell you, it's a prime photo spot. 

Main Street 


Main Street is an absolute dream for taking pictures of those cutesy little shop pictures as the exteriors are adorable. You will probably some of the characters walking around here, as you can see I saw Donald (very exciting) although I didn't get a picture with him - le cry. But I love how American looking the theming is and the attention to detail is incredible. 

The Castle 


I mean, it goes without saying that the castle is absolutely beautiful and is a gold mine for taking photos. I will say that this one is tiny compared to all the others, but it was the first one ever made so bare that in mind. I captured these cute little snaps of the castle from the side - i.e. where there are less people getting in my way hahaha - and I love the flowers and little trees as it makes it look even more magical. 

FantasyLand 


Obviously, FantasyLand is the place to be for those cute ride photos, in particular, the magic tea cups, Dumbo, It's a Small World and the Carousel look amazing for the gram (and I did see Belle on the carousel and had a lil fangirl moment, it wasn't Emma Watson but still).

The Balloons 


I believe the balloons come out towards the evening when the parades and fireworks are approaching and they look beautiful in photos. 
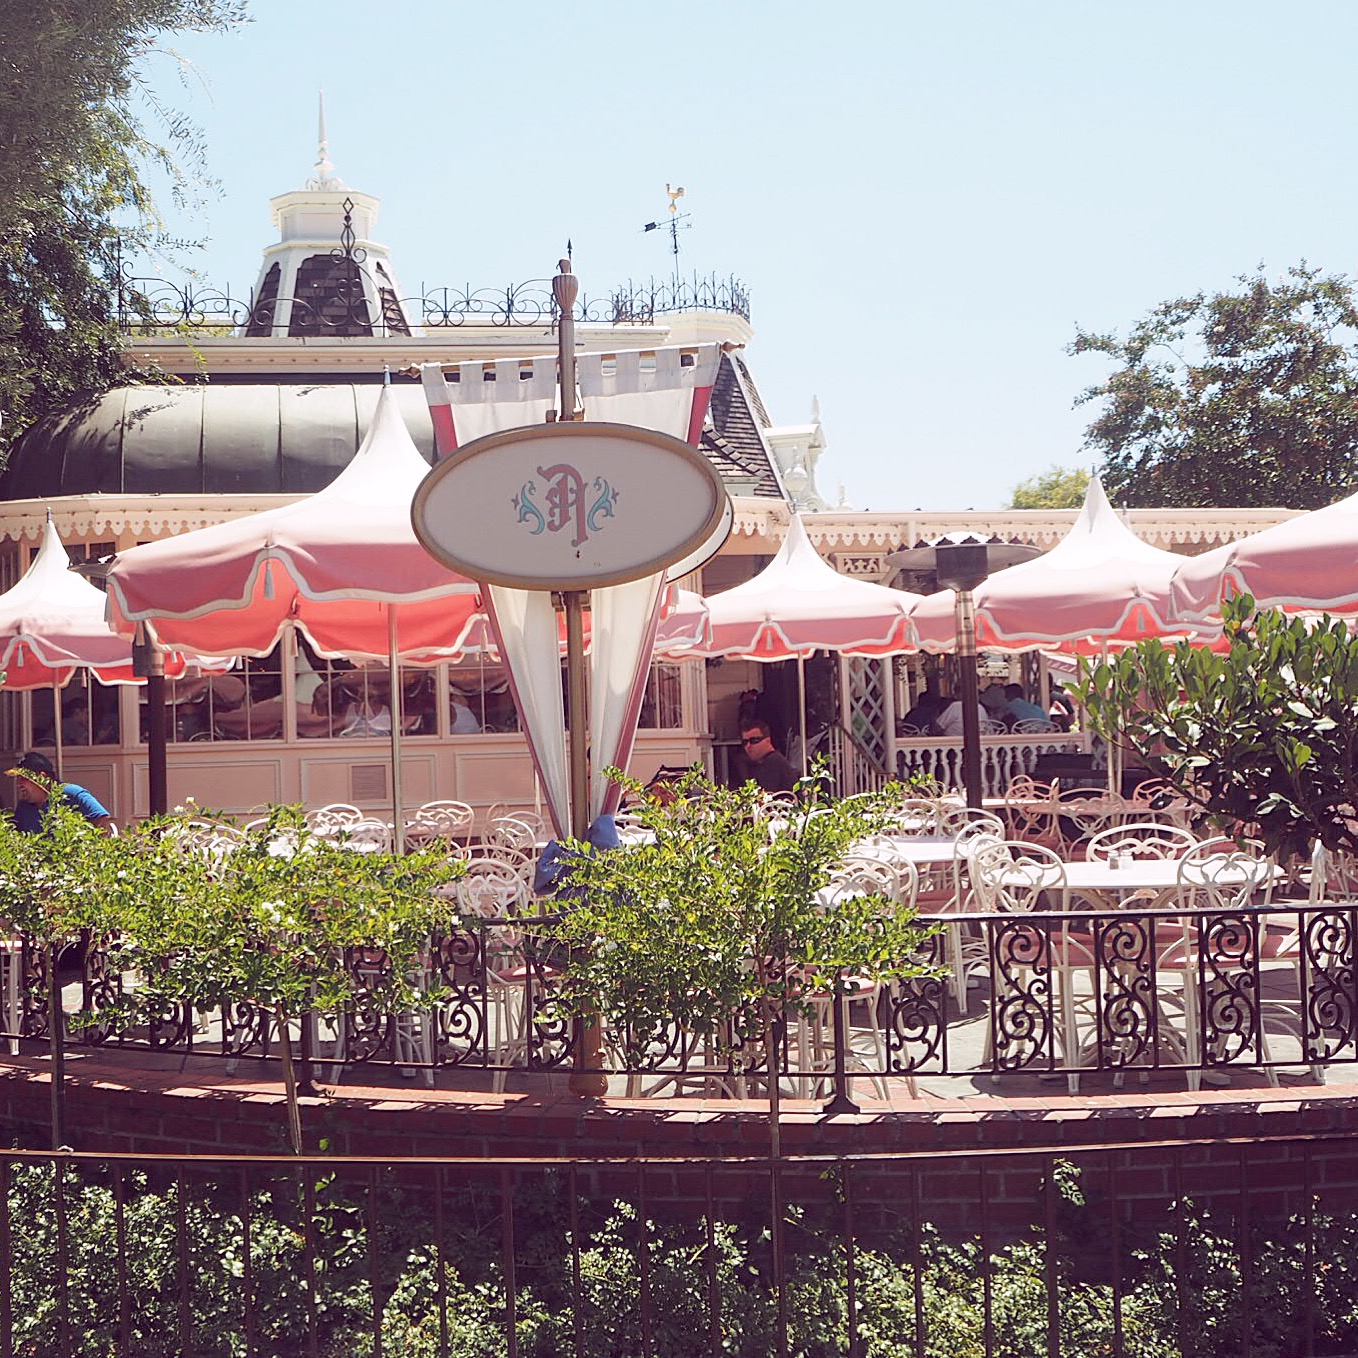
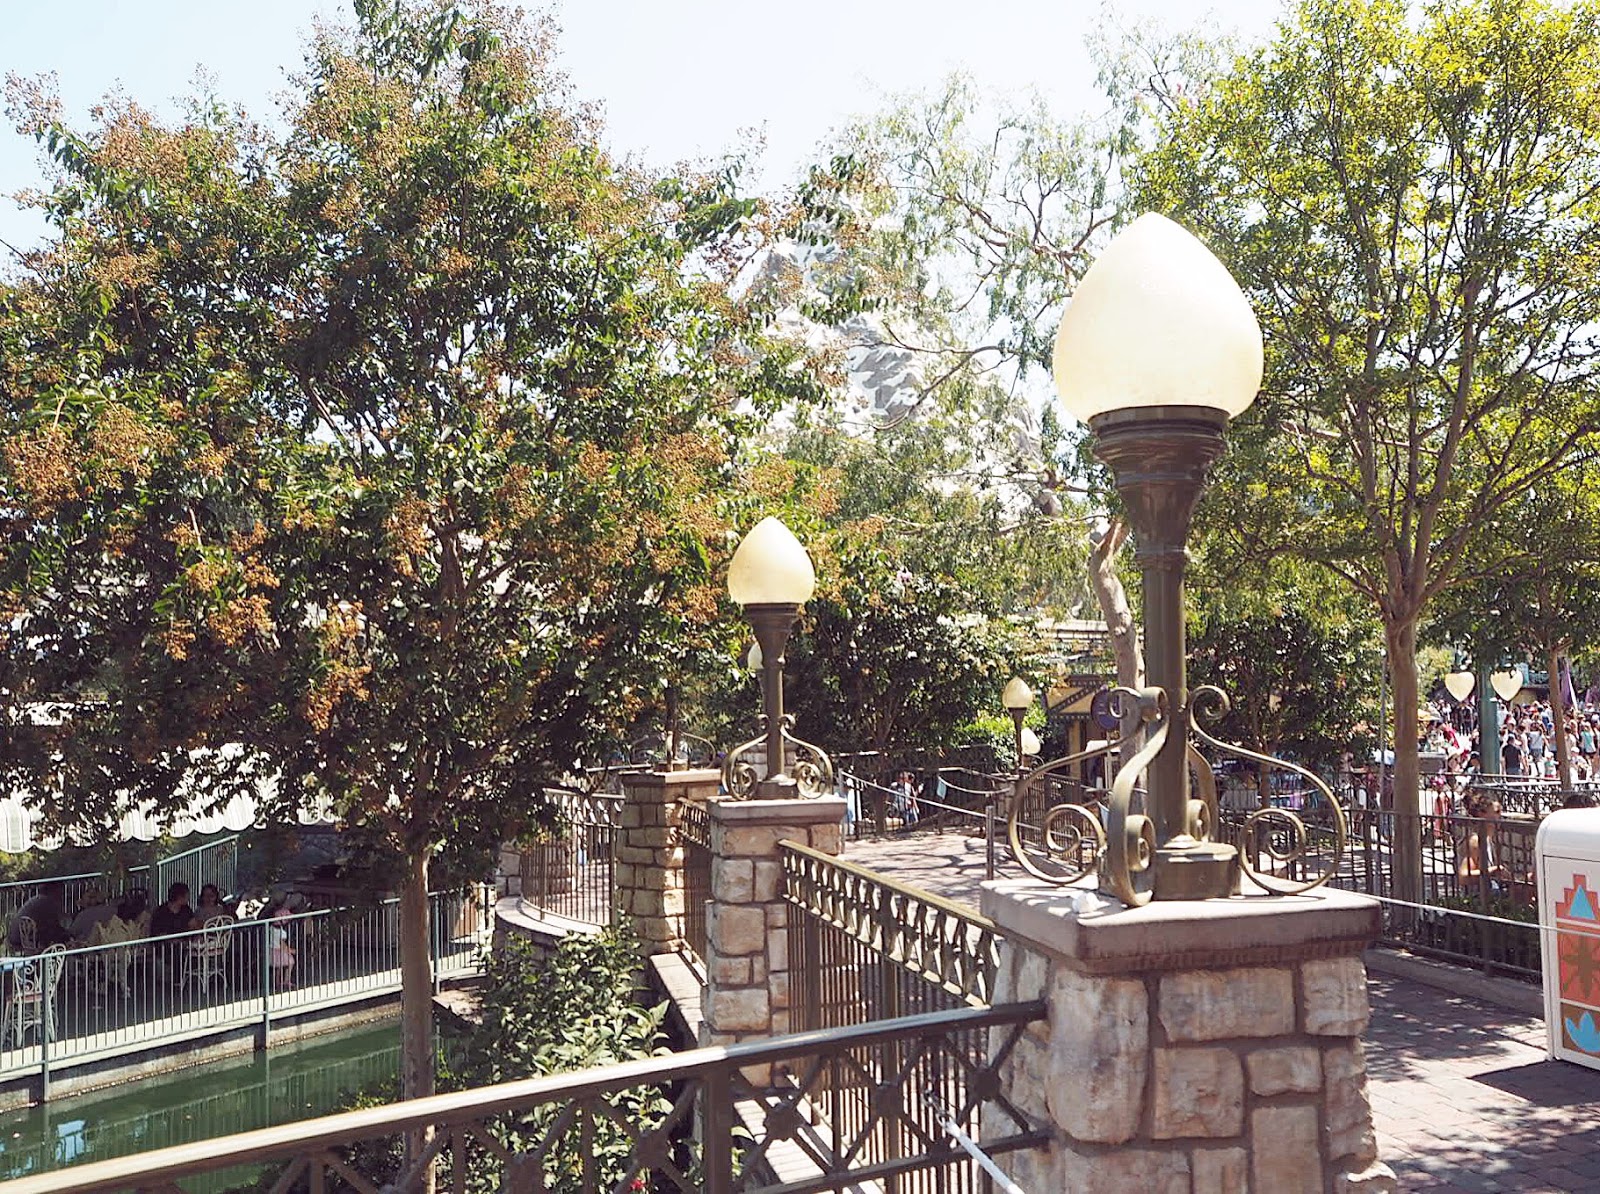
Cute Shops & Cafes 


I mean how cute are these little cafes and shops, can't be dealing. The only annoying thing is that trying to get a picture without people in it is such a challenge, I'm like hello excuse me, just trying to take some nice pictures and you're ruining them plz move thx. 

Walt Disney & Mickey


And finally, the iconic duo. No explanations needed for this.

'I only hope that we never lose sight of one thing - that it was all started by a mouse.' - Walt Disney


So that's is for the first part of this post onto the next part... 


10 Tips For Making The Most Of Your Day


I come from a family who love Disney and we frequently visit the park in Paris so obviously a trip to California meant we had to head over to Anaheim and visit the original park. I think it's a must do thing anyway considering it's so close and obvs, why wouldn't you want to go?!

If you're going in the summer holiday months, we went in July, it's considered to be peak time. I wasn't really sure what to expect but on the day we went it was okay and it wasn't too hectic. I think the thing with this park is the streets are a lot smaller, compared to the other Disney parks, so it can feel a lot more crowded. So anyway, here are my top tips to making the most of a day trip to Disneyland Resort California.


No.1 Do one park 

If you're not going on a Disney holiday or you don't have the time to spend two days there I would recommend just doing one park instead of buying a hopper ticket and trying to do both parks. Obviously, California Adventure has some amazing rides and a life sized Cars Land/Radiator Springs and the new Guardians of the Galaxy ride (converted from the Hollywood Tower of Terror) but it if you're going for that classic Disney magic feel, go to the main park. If it's not peak time then obviously you'll probably get a lot done at both parks but don't push it. 


No.2 Buy tickets in advance

It goes without saying that if you buy your tickets before the day (even if it's the night before) then you won't have to waste time queueing up in the morning when you get there. 


No.3 Arrive before the parks open

I cannot stress this enough. Get there early so you have time to park or travel there etc. You want to be getting into the park just as they open so you can go on rides while there are no queues. You also avoid the security checks etc.  


No.4 Download the Disney App and pay for Fastpass tickets 

I think this is really essential for making the most of your day. Not only does it mean that you don't have to use the machines to get the fastpass tickets for free, but you can do it all from your phone which saves time as you don't have to walk to the ride. It literally means you'll get fast passes for almost every ride. You do have to pay per person but it's so handy. It also tells you the real life wait times for the rides and you can book restaurants as well. Just bare in mind there are a few rides you can't get a fastpass for which I believe is Peter Pan's Flight and Mr Toad's Wild Ride so obvs, if you want to go on those go first thing because the queues are always hella long.


No.5 Bring a portable charger

This is kind of linked with no.4, if you're using your phone for the app and obviously pictures (probably snapchat & instagram) your battery will die a death, which cannot be happening if you need the app for fastpass.. You see the tragedy in this right.


No.6 Be prepared to get soaked on Splash Mountain

So basically we went on Splash Mountain twice. The first time, everything was swell, just a little refreshing splish splash, no big deal homie. The second time, oh the second time. So we went back on in the evening cause we loved the ride and yolo why the heck not? Oh we got DRENCHED. My clothes were soaked through. This wasn't even from the main drop (there are a few smaller ones before) but oh ma daizzzz, it was like I'd come out the shower and also there was no sun to warm/dry me. So yeah, this is your warning.


No.7 Save souvenir buying til the end of the day 

I think this is self explanatory, but you don't want to be lugging around loads of gifts etc so save buying the majority until the end, it'll also be quieter if you go during the fireworks.


No.8 Bring water

Again, you will do a lot of walking and it's most probably going to be very sunny so bring water with you. There are fountains in the park to refill your bottles but buying them in the parks is extortionate. Please just bring some, you won't regret it. 


No.9 Wear comfortable footwear

As mentioned before, you will do a lot of walking. Do not make the mistake of wearing uncomfortable footwear because your feet will die. 


No.10 Figure out if you want to watch the fireworks

Everyone will start reserving spots to watch the fireworks in the evening. Literally they will start from the early afternoon just to see them and they fill up pretty quickly. If you're not that bothered you can virtually see them from anywhere in the park or you can use the time to go on rides while people are watching them. Also, if you've had a really long day you might want to use this time to grab your bits from the shop and head home while there isn't a massive crowd rushing out to get home.


Congratulations if you made it to the end of this post! I've really enjoyed making this post and it's been so nice to share all my Disneyland photos/advice because I'm such a massive Disney nerd and most of our time in the LA area was spent in Newport Beach where it was lovely to just chill out.


'We keep moving forward, opening new doors, and doing new things, because we're curious and curiosity keeps leading us down new paths' - Walt Disney 


Til next time xxx
Share:
© Amelia Lottie | All rights reserved.
Blogger Template Designed by pipdig